Explained
Windshield Repair Kits, Explained
After reading, you'll understand what kind of damage a kit can legitimately fix, where on the glass repair stops being allowed, why resin thickness matters, and what a finished repair should and should not look like.
In this guide
Most people buy a windshield repair kit in a hurry, on the assumption that a chip is a chip. Then they discover three things at once: that the break they have is a shape with a name and a size limit, that where it sits on the glass matters more than how big it is, and that even a textbook repair leaves something visible. None of that is hidden. It is written down in an ANSI standard that the repair industry wrote for itself, and ten minutes with a tape measure will tell you more than any amount of packaging.
The 30-second version
- Damage has a shape and a size limit, and the standard sets them by type: one inch for a bullseye, two inches of body for a combination break, three inches for a star break, 14 inches for a single crack.
- Location beats size, because in the 12-inch-wide band of glass directly in front of the driver, running the full height of the wiper sweep, the rules tighten sharply and some damage should be replaced rather than repaired.
- The tool exists to move air, pulling it out of the break under vacuum and replacing it with resin under pressure, which is why an injector that locks beats an applicator you hold.
- Thin resin and thick resin do different jobs, with low viscosity resin wicking into tight cracks and legs while thick pit resin fills and polishes the surface flush.
- A good repair is still visible, and the standard even has a name for the leftover mark, so judge the work by whether the damage stopped spreading.
The products this guide is about
Our verdict on each, with the full reasoning on the companion review.
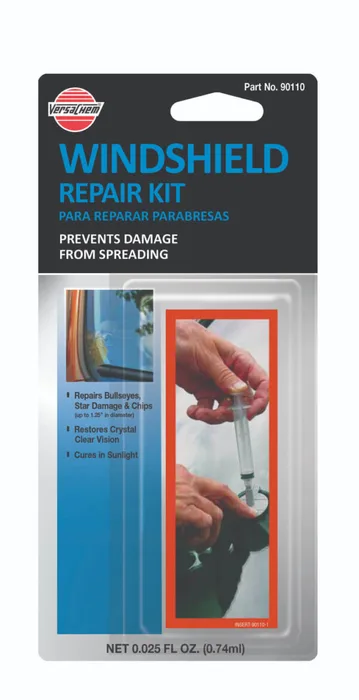
- Buy Versachem Windshield Repair Kit (90110) The shelf kit with a real vacuum-then-pressure injector cycle, published timings and all. Amazon
- Buy Permatex Windshield Repair Kit (09103) The straightforward bullseye kit, and the one whose maker tells you the blemish may not fully disappear. Amazon
- It depends Delta Kits EZ-200S Mini Mobile Windshield Repair System A professional bridge system with two resins and a UV lamp, which is either exactly right or wildly over the top depending on how many chips you expect to fix.
- Skip Rain-X Windshield Repair Kit (600001) The default supermarket grab, sold on a crack-repair promise that its tooling and single resin are not set up to keep. Amazon
What actually matters
- Repairable dimensions - The standard gives a maximum size for each damage type rather than one blanket number. Knowing whether you have a bullseye, a star break or a combination break tells you which limit applies.
- Driver's Primary Viewing Area - This is the band of glass 12 inches wide, centred on the driver, spanning the wiper sweep from top to bottom. Inside it, repair is off the table once damage passes one inch, once the finished pit would exceed 3/16 inch, or if the repair would land within four inches of another repair.
- Vacuum and pressure - Repair is defined as removing air from the break by vacuum or displacement and then filling it with resin. A kit that cannot hold a vacuum is asking resin to push air out of a dead end, which it does badly.
- Resin viscosity - Thin resin travels into hairline legs and cracks, thick resin stays where you put it and builds a polishable surface. Professional kits carry both because one liquid cannot do both jobs well.
- Cure method - Consumer resins cure in sunlight, which ties you to weather and time of day. A UV lamp removes that constraint and lets you cure on your schedule.
- Glass temperature - Resin flow and cure both change with temperature, which is why instructions tell you to park in shade and get the glass into a stated window before starting.
- Value-added features and ADAS - Rain sensors, heads-up displays and forward-facing cameras occupy specific areas of the windshield. The standard says not to repair where those could be affected, and to follow the vehicle maker's recommendations.
The specs, in plain English
Green flags vs red flags
Green flags
- The maker publishes a maximum damage size in inches or millimetres rather than vague language about chips.
- The kit uses a pedestal that seals to the glass plus an injector that locks into separate vacuum and pressure positions.
- Instructions state a glass temperature window and tell you to work in shade.
- The packaging or page admits the repair may leave a visible blemish and may not fully fill the pit.
- There is a curing strip or UV lamp and a stated cure time, not just an instruction to wait.
Red flags
- Marketing that promises an invisible or like-new result.
- One small bottle of general purpose resin sold as a fix for both chips and long cracks.
- No mention anywhere of where on the windshield you should not attempt a repair.
- An applicator you have to hold in place by hand for the whole cycle instead of a locking pedestal.
- Claims to repair damage that goes through both layers of glass, or damage on the inside surface.
Who's who: the brands
- Versachem - Automotive chemical brand whose windshield kit publishes an unusually specific vacuum and pressure sequence for a shelf product.
- Permatex - Long-running automotive chemicals maker whose windshield kit is aimed at bullseye damage and is candid about the cosmetic result.
- Rain-X - Best known for glass treatments, with the most widely stocked consumer repair kit and the broadest damage claims.
- J-B Weld - Adhesive and epoxy specialist whose Windshield Saver kit uses a pressure-lock pedestal and a sun-activated acrylic resin.
- Delta Kits - Professional windshield repair equipment maker that sells bridges, injectors and separate bond and pit resins by viscosity.
How to read a listing without getting fooled
Read a windshield repair kit listing in this order. First find the damage size and type the maker actually claims, in inches or millimetres, and compare it against the break in front of you rather than against the photo on the box. Second, look at the applicator: a pedestal that adheres to the glass with an injector that locks in two positions is doing more work than a device you press and hold. Third, find the resin quantity and any viscosity information, and treat a single small bottle as a chip solution regardless of what the crack claim says. Fourth, look for working conditions, meaning a glass temperature range, an instruction to work in shade and a stated cure time in sun or under a lamp. Anything that skips all four and leads with a before-and-after photo is selling the outcome rather than the process.
How much should you spend?
Consumer windshield repair kits sit firmly in the budget tier, and the spread between the cheapest and the most complete shelf kit is small enough that it should not drive your decision. Pay for the injector design and the published instructions rather than the brand on the clamshell. The genuine step up is to a professional bridge system in the premium tier, which is a different order of magnitude and buys you a screw injector, separate bond and pit resins, a UV lamp, a drill and enough consumables for dozens of repairs. That only pays off if you expect to do many repairs, and it does not pay off at all if you are going to attempt damage the standard says should be replaced. If the damage is outside the repairable limits or sits in the driver's viewing area, the money is better spent at a shop.
Questions, answered
What is the resin actually doing inside the break?
It is filling a void that is currently full of air. The tool removes that air by vacuum or by displacement, and the resin flows in to take its place, then cures into a solid that seals the break and bonds the separated glass. Because the resin is formulated to approximate the refractive index, colour and clarity of the glass, the filled area scatters much less light than an air-filled break. That is why a repair looks better and, more importantly, why the damage stops spreading.
Why do the instructions care so much about shade and glass temperature?
Temperature changes how the resin flows and how fast it cures. Hot glass in direct sun can start curing the resin before it has reached the ends of the legs, leaving voids that will fail later. Cold glass makes the resin sluggish and slow to travel. That is why kits tell you to move the car into shade and wait for the windshield to reach a stated range, commonly around 50 to 75 degrees F, before you start, and only then move it into the sun to cure.
Does it matter how long the chip has been there?
Yes, quite a lot. Dirt, road film and moisture work their way into the break over days and weeks, and the standard says damage contaminated with visible impurities that cannot be removed by cleaning should be replaced rather than repaired. Contamination also stops the resin bonding cleanly, so an old chip can look repaired and still spread. If a chip is fresh, cover it with clear tape to keep water and grit out until you can deal with it.
Can a finished repair fail later?
It can, and the standard tests for exactly that. Resins seeking recognition under ROLAGS have to survive a thermal cycling test in which repaired samples are equilibrated at 0 degrees F in a freezer and then heated from below until the repair side reaches 150 degrees F, repeated up to three times. A conforming repair should come through unchanged, with no separation of the star portion from the glass or the interlayer and no voids appearing in the bullseye. That cycle is a stand-in for a cold morning and a hot defroster, which is when marginal repairs let go.
Or jump to the head-to-head: Versachem Windshield Repair Kit (90110) vs Permatex Windshield Repair Kit (09103).