Explained
Crimping Tools, Explained
After reading, you'll understand why the die has to match the terminal, what a ratchet does and does not guarantee, and which standards give you a number you can actually check a crimp against.
In this guide
Most first-time buyers shop this category on wire gauge, because that is the number printed on the tool. Gauge is the easy half. The hard half is the shape of the die, because an insulated terminal, a bare terminal and a ferrule each get squeezed into a different form, and a crimp made with the wrong profile can look perfectly convincing while carrying almost no mechanical hold. The second trap is the ratchet, which buyers read as a guarantee of correctness when it is only a guarantee that you finished the stroke.
The 30-second version
- The die decides the crimp, so a tool that names the terminal family it was cut for is worth more than one that only prints an AWG range.
- A ratchet guarantees completion, not calibrated force, which is exactly how both the FAA and NASA standards describe it.
- A good crimp is gas tight, meaning the oxides were broken down and clean metal was forced against clean metal, which is why geometry beats hand strength.
- Pull-out force is a real published number, defined by UL 486A-486B and NASA-STD-8739.4A even though the tool makers do not print it.
- The crimper on a wire stripper is a compromise, with one unsupported jaw covering families that need different profiles and nothing stopping a half-finished squeeze.
The products this guide is about
Our verdict on each, with the full reasoning on the companion review.
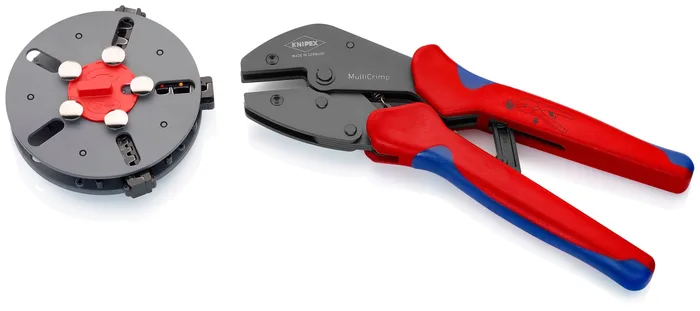
- Buy Knipex 97 33 01 MultiCrimp Crimping Pliers One lever-action frame with three labelled dies in a belt-clip magazine, each cut for a different terminal family. Amazon
- Buy Ideal Electrical Crimpmaster 30-500 Ratcheting Crimp Tool with Insulated Terminal Die Set A ratcheting frame that will not open until the cycle finishes, sold with the insulated terminal die set and thirteen die sets available. Amazon
- It depends Wiha 43612 Ratchet Crimper for End Sleeves A German-made ratcheting ferrule crimper with six fixed positions that does end sleeves beautifully and nothing else at all. Amazon
- Skip Klein Tools 1010 Long Nose Multi Tool Wire Stripper, Wire Cutters, Crimping Tool A well made American stripper and cutter whose crimping section is one stamped jaw asked to serve two terminal families with no ratchet. Amazon
What actually matters
- Die profile - The shape the die closes the barrel into, and the single thing that separates a crimp from a pinch. Insulated terminals get an oval compression through the sleeve, bare barrels get an indenter driven into a supporting nest, and ferrules get squared or hexagonal.
- Full cycle ratchet - A mechanism that will not let the dies open until the stroke is complete. NASA-STD-8739.4A makes it a requirement and the FAA requires that it cannot be disengaged during the crimp, which removes the most common human error in the process.
- Crimp height - The measured height of the finished crimp, and the number professionals use to verify the joint without destroying it. The specification is set per terminal, which is another way of saying the die and the terminal are a matched pair.
- Gas tight connection - The goal of the whole operation, where the compression excludes air from the interface so oxides cannot form and resistance stays low. It is achieved by forcing metal together at high contact pressure so contaminant gases cannot enter the contact area.
- Pull-out force - How hard you can pull before the wire leaves the terminal. UL 486A-486B and NASA-STD-8739.4A both publish minimums by wire size.
- Terminal family - Insulated, non-insulated, heat shrink and ferrule are four separate categories, not four finishes, and makers sell separate dies for them, which tells you how little they interchange.
- Insulation grip - The rear wing of a terminal that closes onto the wire jacket rather than the conductor, taking bending load off the electrical crimp. A die that ignores it leaves the conductor crimp doing a job it was not designed for.
The specs, in plain English
Green flags vs red flags
Green flags
- The listing names the terminal family the die was cut for, not just an AWG range.
- The maker cites a terminal standard such as DIN 46228 for ferrules or DIN 46234 for compression lugs.
- A full cycle ratchet is described, ideally with wording about not releasing until the cycle completes.
- Interchangeable dies exist and are sold individually, so the tool grows with the work.
- Capacities are quoted separately per die rather than as one range covering everything.
Red flags
- One jaw is claimed for insulated and non-insulated terminals at the same time.
- A very wide AWG range with no mention of which terminal type it applies to.
- The crimping section is a secondary feature on a stripper, cutter or multi-tool.
- No ratchet, cycle lock or release mechanism appears anywhere in the specification.
- Marketing talks about crimping power or leverage instead of die geometry or crimp height.
Who's who: the brands
- Knipex - German pliers maker whose crimping range is organised by terminal family, including magazine-fed frames that carry several labelled dies at once.
- Wiha - German tool maker that is unusually specific about standards, naming DIN references per crimping tool for ferrules, insulated lugs and flat connectors.
- Ideal Electrical - American electrical trade brand whose Crimpmaster frame plus separate die sets is the most common professional route to covering several terminal types.
- Klein Tools - American electrician's brand with a large range of combination strippers, some with a crimping section, as well as dedicated crimpers.
- Molex - Connector manufacturer that publishes crimp quality documentation covering crimp height, bell mouth and gas tight terminology.
How to read a listing without getting fooled
Read the crimping line of a spec sheet backwards. Start with the terminal type it names, because that is the constraint, then check the AWG or square millimetre range attached specifically to that type. If a listing gives one range and several terminal families in the same sentence, that is a single die being asked to do several jobs, and you should assume it does none of them to specification. Next, look for the word ratchet and for any description of what it does at the end of the stroke. Then look for whether dies are interchangeable and whether individual dies are sold, since that tells you whether the maker treats terminal families as separate problems. Finally, notice what is missing: almost nobody in the consumer market publishes a pull-out force or names UL 486A-486B, so you will be checking your own crimps against the standard rather than against the catalogue.
How much should you spend?
Budget tier in this category is mostly combination tools and unratcheted pliers, and it is honest value only if you treat the crimping function as a bonus rather than the reason you bought it. Mid-range is where a real ratcheting frame with one proper die set starts, and it is the tier most people should aim at, because the jump from no ratchet to a full cycle ratchet buys more reliability than any other upgrade here. Premium buys two different things: either a frame with multiple interchangeable dies covering several terminal families, or a single-purpose German tool that does one family extremely well for years. Neither premium route is wasted money, but they solve opposite problems, so decide first whether your terminals vary. Spending premium on a single-family tool when your work is mixed is the most common expensive mistake.
Questions, answered
What do the red, blue and yellow colours on insulated terminals mean?
They are a size convention, and the die cavities on a good crimper are marked to match. Blue and yellow are consistent across makers at 16-14 AWG and 12-10 AWG. Red is where they diverge slightly: Ideal's insulated terminal die set marks it 22-18, and other makers can differ. Check the marking on your own tool rather than assuming, and match the terminal to the cavity rather than the wire to the cavity.
Why do professionals measure crimp height instead of just pulling on the wire?
Because a pull test destroys the sample and crimp height does not. Measuring crimp height is a quick non-destructive way to confirm the terminal was compressed correctly around the conductor, which lets a shop check a process mid-run without scrapping good parts. Pull tests still happen, but as periodic verification rather than continuous checking. For a home user the practical version is simpler: pull firmly on every crimp you make, and if the wire moves at all in the barrel, cut it off and redo it.
Do I need to calibrate a crimping tool?
You should not be calibrating it yourself. NASA-STD-8739.4A requires that calibration adjustments be accessible only when the tool is disassembled and made only by the manufacturer or a calibration laboratory, and that adjustable tools be set, sealed or locked before use. The FAA gives the same instruction on who may make calibration adjustments. Some consumer tools have a visible adjustment wheel, and the temptation to tighten it when a crimp feels loose is exactly the error the standards are written to prevent. If crimps are failing, the die or the terminal is usually wrong, not the setting.
Can I crimp solid wire?
Not into a crimp contact, according to the standard that governs the most demanding use of them. NASA-STD-8739.4A states that crimped contacts shall be used with stranded wire only and that solid wire shall not be used with crimped contacts, and it separately prohibits crimping solder tinned stranded wire. The reason is that a crimp works by deforming many strands into each other and into the barrel wall, which a single solid conductor cannot do. For solid house wiring, use the connector type designed for it rather than forcing a terminal barrel onto it.
Or jump to the head-to-head: Knipex 97 33 01 MultiCrimp Crimping Pliers vs Ideal Electrical Crimpmaster 30-500 Ratcheting Crimp Tool with Insulated Terminal Die Set.