

Pets
The Best Reptile Thermostats: 4 Compared (and One to Skip)
We compared four reptile thermostats on the two things that decide whether one is safe in your setup: whether its control type matches your heat source, and what the maker documents it doing when something goes wrong.
The short version
The Herpstat 2 from Spyder Robotics is the one to buy if you can stretch to it, because it is the only unit here whose manual documents both dimming and pulse proportional control, selectable per output, plus an internal safety relay that can cut power to everything on a high alarm. Zoo Med's ReptiTemp Dimming Thermostat is the value pick: a genuine dimming unit rated to 600 watts, with adjustable sunrise and sunset ramping and separate day and night setpoints, which is the correct control type for a light-emitting basking bulb. The Inkbird ITC-306T is the depends pick. Inkbird publishes it as on/off, heating only, which makes it a sensible cheap controller for a heat mat or heat cable and the wrong tool for any bulb that produces light. Skip the Zoo Med ReptiTemp 500R: it is an analog on/off dial with no temperature readout, a range Zoo Med gives as roughly 70 to 110 F, and no published alarm or cutoff, so you cannot see what it is doing or be told when it stops doing it. Whatever you buy, the wattage on the label is a hard ceiling, not a target, and no maker here publishes a separate continuous-duty rating. Best for: keepers who want the control type to match the heat source and want to know, in writing, what the unit does when it fails.
Our picks at a glance
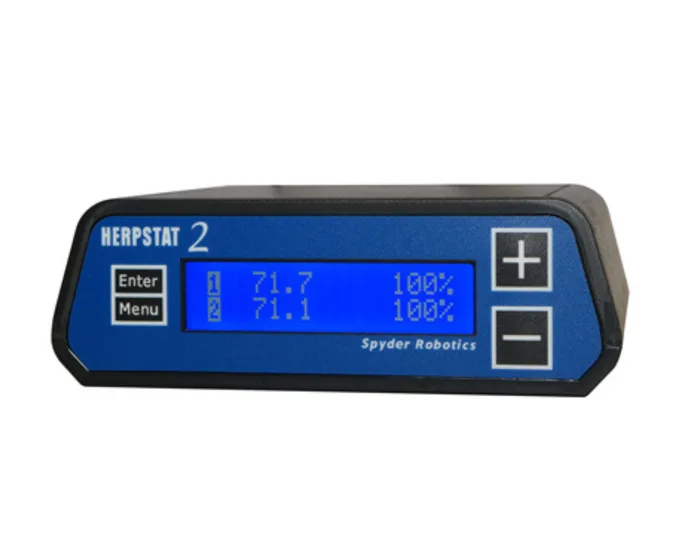
- Spyder Robotics Herpstat 2 - Buy. Two independent outputs, each switchable between dimming and pulse proportional control, with an internal safety relay behind them.
- Zoo Med ReptiTemp Dimming Thermostat (RT-600P) - Buy. A proper dimming thermostat for basking bulbs, with adjustable ramping and separate day and night setpoints, at a price a first-time keeper will actually pay.
- Inkbird ITC-306T - It depends. A cheap on/off day and night controller that is good for heat mats and wrong for anything that lights up.
- Zoo Med ReptiTemp 500R Remote Sensor Thermostat - Skip. A widely sold analog dial thermostat that gives you no readout, no alarm and no published cutoff on a device that can fail with the heat stuck on.
The verdict in 30 seconds
What mattered most
- Control type
- Suitable for light-emitting bulbs
- Rated load
- Outputs and probes
- Temperature range
- Display and feedback
A reptile thermostat is the only thing standing between a heat source and an animal that cannot walk away from it, and it is a mains switching device sitting on a shelf in your house. That makes it an animal-safety product and a fire-safety product at the same time. The part almost everyone gets wrong is not the brand, it is the type: on/off, pulse proportional and dimming are three different machines, and manufacturers are unusually blunt about which heat sources each one may drive. We picked four units that are on sale now, read the actual manuals and instruction sheets, and lined up the wattage ratings, the probe guidance and the documented failure behaviour.
Two independent outputs, each switchable between dimming and pulse proportional control, with an internal safety relay behind them.
Best for: A keeper running two enclosures, or one enclosure that needs a light-emitting basking source and a separate non-light heat source.
- The manual lists Heat (Dimming) and Heat (Pulse) as selectable output modes, so one unit can run a basking bulb on one channel and a ceramic emitter or mat on the other.
- Two outlets and two probes with fully independent settings, rated 900 watts total and 500 watts maximum on either output.
- Documented failsafes include an internal safety relay that cuts main power to all outputs on a high alarm, plus internal error detection that shuts off heat if a sensor fails or is disconnected.
- The safety relay is not enabled out of the box: the manual gives INDIVIDUAL OUTPUTS as the default option, and that setting does not enable the relay.
- Spyder Robotics publishes a one year limited warranty, shorter than the five years several other thermostat makers advertise.
- No UL, ETL or CSA listing appears on the product page or in the user manual we read.
- The menu tree is deep and the safety, night cycle and alarm settings all live in different places, so first setup takes a sitting with the manual.
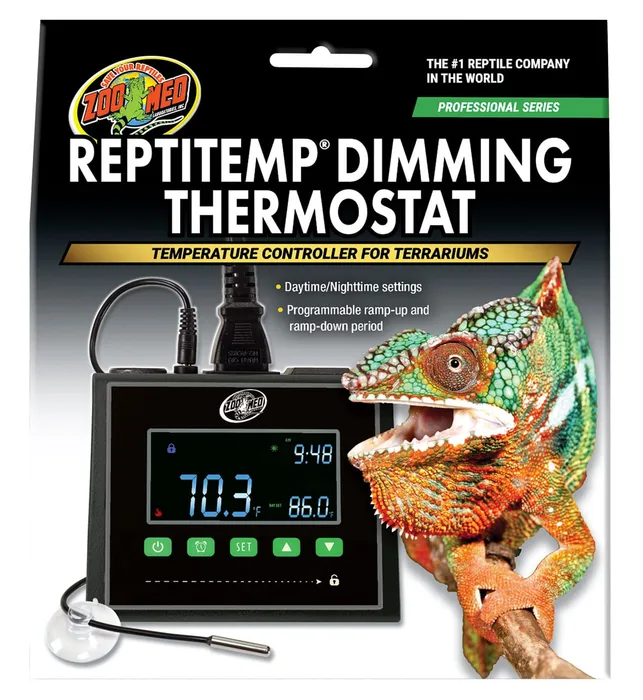
A proper dimming thermostat for basking bulbs, with adjustable ramping and separate day and night setpoints, at a price a first-time keeper will actually pay.
Best for: A single enclosure heated by a basking bulb, where you want correct dimming control without premium controller money.
- It is a dimming unit, which is the control type makers across this category name for light-emitting bulbs, and Zoo Med rates it to 600 watts of heating devices.
- Ramp-up and ramp-down are separately adjustable from 0 to 99 minutes each, with a 30 minute default, and daytime and nighttime setpoints have their own start times.
- The instruction sheet gives real probe placement guidance, including shading the probe tip if it sits near an overhead basking source, and the waterproof 6.5 foot probe is replaceable.
- The alarm is a deviation band with a factory default of 30 degrees, which is very wide, and the sheet says it can be turned off entirely by setting it to 0.
- No secondary hardware cutoff is documented: the audible and visual alarm is the only published protection.
- One outlet and one probe, so a second heat source means a second unit.
- Zoo Med specifies 120 V 60 Hz only and 600 watts maximum resistive load, and warns against exceeding it.
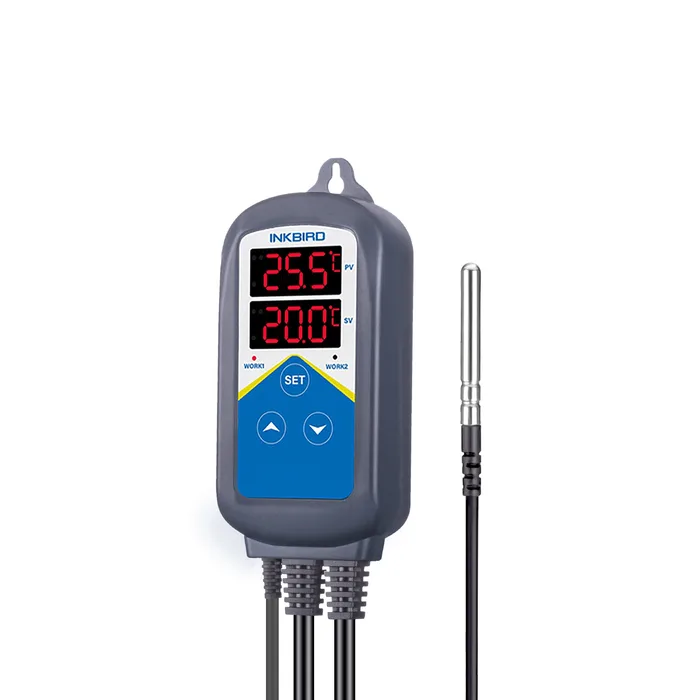
A cheap on/off day and night controller that is good for heat mats and wrong for anything that lights up.
Best for: Heat mats, heat cable, panel heaters or a small rack where nothing you are controlling emits light.
- Inkbird states the control mode plainly in its specs table as On/Off Control, Heating, which is exactly the right behaviour for a heat mat or heat cable.
- Two independent time cycles for day and night, and a dual display that shows measured temperature and setpoint at the same time.
- Inkbird describes two relays inside, one for control and one for protection, and lists over-temperature and sensor-fault alarms.
- On/off switching makes it the wrong controller for a light-emitting basking bulb, because the lamp is cycled fully on and off.
- Two sockets but only one probe and one setpoint, so both heaters follow the same channel whether you want that or not.
- Published control accuracy is plus or minus 1 degree Fahrenheit across most of the range, coarser than the proportional units here.
- Inkbird publishes the output as a 10 A relay rating at 100 to 240 V AC rather than a watt figure, so you have to work out your own headroom.
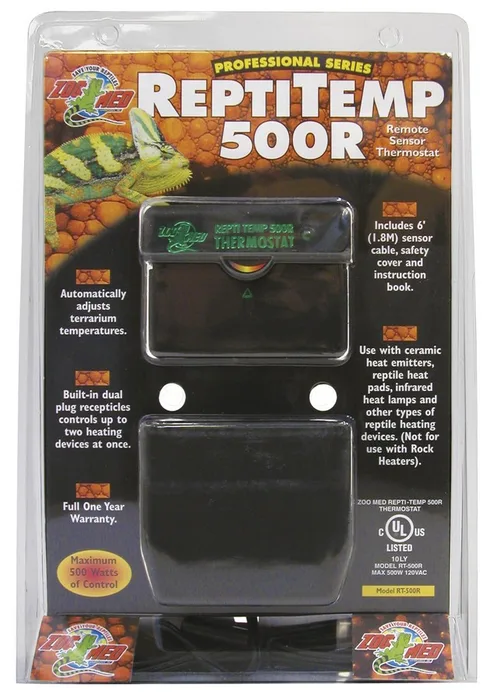
A widely sold analog dial thermostat that gives you no readout, no alarm and no published cutoff on a device that can fail with the heat stuck on.
Best for: Almost nobody buying new; if you already own one, keep it on a low-wattage mat and put a separate thermometer in the enclosure.
- Zoo Med publishes a clear ceiling of 500 watts and warns in capitals against exceeding it with any combination of heaters.
- A safety cover slides over the control dial to stop the setting being knocked, and the six foot remote sensor lets you put the sensing point where the animal is.
- Two plug receptacles and a very short instruction sheet mean there is little to configure incorrectly.
- Analog dial with no temperature display: the only feedback is an indicator light cycling on and off, so you cannot see what the unit believes is happening.
- On/off control, which the makers of dimming thermostats specifically warn against for light-emitting bulbs because the constant cycling shortens lamp life.
- Zoo Med gives the range as approximately 70 to 110 F, so it cannot hold a low night setpoint.
- No over-temperature alarm, sensor-failure detection or secondary cutoff is documented anywhere in the product page or instruction sheet.
| Criteria | Herpstat 2 Top pick | ReptiTemp Dimming Thermostat (RT-600P) | ITC-306T | ReptiTemp 500R Remote Sensor Thermostat |
|---|---|---|---|---|
| Verdict | Buy it | Buy it | It depends | Skip it |
| Best for | A keeper running two enclosures, or one enclosure that needs a light-emitting basking source and a separate non-light heat source. | A single enclosure heated by a basking bulb, where you want correct dimming control without premium controller money. | Heat mats, heat cable, panel heaters or a small rack where nothing you are controlling emits light. | Almost nobody buying new; if you already own one, keep it on a low-wattage mat and put a separate thermometer in the enclosure. |
| Price tier | $$$ · premium | $$ · mid-range | $ · budget | $ · budget |
| Control type | Proportional, dimming or pulse selectable per output | Dimming | On/off, heating only | On/off, analog dial |
| Suitable for light-emitting bulbs | Yes, in dimming mode | Yes, it is built for that | No, maker lists on/off heating only | Not advised, on/off cycling |
| Rated load | 900 W total, 500 W max per outlet | 600 W maximum resistive load | 10 A at 100 to 240 V AC, no watt figure published | 500 W total across both ports |
| Outputs and probes | 2 outlets, 2 probes, independent settings | 1 outlet, 1 replaceable waterproof probe | 2 sockets, 1 probe, one shared setpoint | 2 receptacles, 1 sensor, one dial |
| Temperature range | 40 to 150 F | 36 to 140 F | -58 to 210 F | About 70 to 110 F |
| Display and feedback | LCD, tenths of a degree, high and low alarms | LCD touch panel, clock, day and night values | Dual LED windows, measured plus setpoint | Dial and indicator light, no readout |
| Documented failsafes | Safety relay cuts all outputs on high alarm (off by default), sensor-fail shutoff, high and low alarms | High and low alarm, deviation based, default 30 degrees, can be disabled | Second relay described as protection, over-temperature and sensor-fault alarms | None published |
| Warranty | 1 year limited | 12 months | 1 year | 1 year |
Which one is right for you?
- A keeper running two enclosures, or one enclosure that needs a light-emitting basking source and a separate non-light heat source. Buy it Spyder Robotics Herpstat 2
- A single enclosure heated by a basking bulb, where you want correct dimming control without premium controller money. Buy it Zoo Med ReptiTemp Dimming Thermostat (RT-600P)
- Heat mats, heat cable, panel heaters or a small rack where nothing you are controlling emits light. It depends Inkbird ITC-306T
- Almost nobody buying new; if you already own one, keep it on a low-wattage mat and put a separate thermometer in the enclosure. Skip it Zoo Med ReptiTemp 500R Remote Sensor Thermostat
How we judged the field
Five things decide whether a reptile thermostat is the right one, and only one of them is accuracy. First, control type: on/off switches the heater fully on and fully off, pulse proportional sends bursts of power, and dimming varies the voltage smoothly. Makers are explicit that these are not interchangeable, and pairing the wrong one to a light-emitting bulb is the most consequential mistake in the category. Second, documented failure behaviour, because a device that switches mains power can fail with the heat stuck on, and the honest question is what the manufacturer says happens then. Third, probe design and the placement guidance that comes with it, since a probe in the wrong spot gives a perfectly accurate reading of something you do not care about. Fourth, the wattage rating, which is a hard ceiling rather than a target. Fifth, whether the unit can tell you something is wrong: a readout, a settable alarm, a sensor-fail detection.
The field splits cleanly into three tiers. At the top are keeper-grade controllers from small specialists, mostly Spyder Robotics and Vivarium Electronics in the US and Microclimate and Habistat in the UK, which publish real manuals, real wattage limits and, in some cases, real hardware failsafes. In the middle are the mainstream pet-trade units from Zoo Med, sold in every chain store, which now include a proper dimming model alongside older on/off ones. At the bottom are general-purpose plug-in temperature controllers such as the Inkbird line, borrowed from home brewing and incubation, which are cheap and clearly specified but are on/off devices by design. We took one from each of those tiers, plus the analog unit that a lot of first-time keepers still buy by mistake, so the comparison shows the type differences rather than four versions of the same box.
Spyder Robotics Herpstat 2
Buy itThe Herpstat 2 is the one to buy if the budget stretches, and the reason is in the output mode list rather than the marketing. Spyder Robotics documents Heat (Dimming) and Heat (Pulse) as selectable modes on each of the two outputs, which means a single unit can hold a basking bulb on channel one and a ceramic emitter or a mat on channel two, each with its own probe and its own settings. It is rated 900 watts total with a firm 500 watt cap on either outlet, and the manual states an internal safety relay can cut main power to all outputs when a high alarm condition is breached, alongside error detection that kills heat if a probe fails or is unplugged. The catch is that the relay is not on by default; the manual lists INDIVIDUAL OUTPUTS as the standard setting and says plainly that this option does not enable the built-in safety relay. Warranty is one year limited, and no third-party electrical listing appears in the documentation. This is for the keeper who wants one box to handle a mixed setup.
Zoo Med ReptiTemp Dimming Thermostat (RT-600P)
Buy itZoo Med’s ReptiTemp Dimming Thermostat is the value pick because it does the single most common job correctly. It is a real dimming thermostat rated to 600 watts maximum resistive load on a 120 V 60 Hz supply, with separate daytime and nighttime setpoints and, unusually at this price, independently adjustable ramp-up and ramp-down periods from 0 to 99 minutes so the lamp does not snap between values. The probe is waterproof, replaceable and on a 6.5 foot lead per the instruction sheet, and the instruction sheet is the best in this group on placement: shade the probe tip if it sits near an overhead source, or alternatively put it at the cool end and set it to the upper limit of the safe ambient so the lamp only dims in a genuine room-overheating emergency. The weak spot is protection. The alarm is a deviation band defaulting to 30 degrees either side, far wider than you want, and Zoo Med says it can be set to 0 to disable it. No secondary cutoff is documented. Set that alarm narrow on day one, and this is the right unit for one bulb-heated enclosure.
Inkbird ITC-306T
It dependsThe Inkbird ITC-306T is the depends pick, and it earns that label by being good at one job. Inkbird states in the specification table that the control mode is On/Off Control, Heating, with a 10 A relay contact rating at 100 to 240 V AC and control accuracy of plus or minus 1 degree Fahrenheit across most of the range. For a heat mat, heat cable or a panel heater, that is a perfectly sensible machine: it gives you two independent day and night cycles, a dual display showing measured and target temperature together, calibration offset, over-temperature and sensor-fault alarms, and a second internal relay that Inkbird describes as protection rather than control. What it cannot do is drive a light-emitting bulb, because on/off control cycles a lamp fully on and off, which is exactly the behaviour Habistat warns causes frequent lamp failure and stresses the animal. The other limitation is structural: two sockets, but one probe and one setpoint, so both heaters follow the same channel. Buy it for a mat-heated setup or a small rack, not for a basking lamp.
Zoo Med ReptiTemp 500R Remote Sensor Thermostat
Skip itThe ReptiTemp 500R is a real product that a lot of people still buy, and it is the one to skip. Zoo Med describes it as a remote sensor wire thermostat controlling a maximum of 500 watts of reptile heating devices, switching them on and off as the sensor crosses the setpoint. The problem is that everything about the feedback loop is hidden from you. There is no temperature display at all: the only indication is a lamp that cycles on and off, and the instructions tell you to set the dial by trial and error until the light behaves the way you expect. Zoo Med gives the range as approximately 70 to 110 degrees Fahrenheit, which rules out a proper night drop for a lot of species, and the range tops out around 110. Most importantly, nothing in the product page or the instruction sheet documents an over-temperature alarm, sensor-failure detection or any secondary cutoff, so if it sticks on you find out from the animal. It is for someone who already owns one and is running a small mat, not for a new purchase.
Sources
Specs in this review come from these pages.
- HabiStat: Mat Stat, Pulse Thermostat and Dimming Thermostat product pages (habistat.com)
- Microclimate: Dimmer B1 and Pulse B2 user guide (PDF) (microclimate.co.uk)
- Spyder Robotics: Herpstat 1 and Herpstat 2 user manual (PDF) (spyderrobotics.com)
- Zoo Med: ReptiTemp Dimming Thermostat (RT-600P) instructions (zoomed.com)
- Zoo Med: ReptiTemp 500R Remote Sensor Thermostat product page and instructions (zoomed.com)
- Inkbird: ITC-306T specifications (inkbird.com)
Spyder Robotics Herpstat 2 vs Zoo Med ReptiTemp Dimming Thermostat (RT-600P): which should you buy?
The two buy picks are answering different questions. The Herpstat 2 is a controller for a collection, or at least for a setup with more than one thing to regulate: two outputs, two probes, independent settings on each, and the ability to run one channel in dimming mode for a light-emitting bulb while the other runs pulse for a ceramic emitter or a mat. It is also the only unit here that documents a internal relay capable of removing power from all outputs on a high alarm, which is the single most useful safety feature in the group. The Zoo Med ReptiTemp Dimming Thermostat is a controller for one enclosure with one bulb. It does that job with the correct control type, sensible ramping, a replaceable waterproof probe and the clearest probe placement advice in the group, but it is one output, one probe, and its only documented protection is an alarm you have to narrow yourself.
So choose on the shape of your setup rather than on quality. If you have one bearded dragon or one crested gecko under one lamp, and you want to spend the difference on lighting or an enclosure upgrade instead, the Zoo Med is the sensible buy, and you should set the alarm band tight the day you plug it in. If you have two enclosures, or one enclosure with a daytime basking bulb and a separate night-time non-light heat source, the Herpstat 2 is worth the jump, because two separate units give you two things to monitor. Whichever you pick, go into the settings on day one, enable the protection the maker gives you, and put an independent thermometer in the enclosure so you can catch a probe that has drifted or been moved.
What to look for
- Match the type to the heat source: on/off suits mats and cable, pulse proportional suits ceramic emitters and mats, and dimming is the type makers name for light-emitting basking bulbs.
- Read the failure paragraph, not the accuracy figure: look for a documented safety relay, an over-temperature cutoff, sensor-failure detection or a fast-blow fuse, and note whether the maker says it is enabled by default.
- Treat the wattage rating as a ceiling: none of these makers publishes a separate continuous-duty figure, so add up everything on the unit, respect any per-outlet cap, and leave headroom rather than sitting at the limit.
- Check the probe, not just the box: you want a replaceable, waterproof probe on a lead long enough to reach the spot the maker recommends, and a maker who actually tells you where that spot is.
- Insist on an alarm you can set narrow: a high and low alarm is only useful if the band is tight, so check the default and change it, and be wary of units where the alarm can be silently switched off.
- Look for a listing mark and use a GFCI: check the housing and plug for a UL, ETL or CSA mark before you trust an unbranded mains switch, and follow Habistat’s advice to supply the thermostat through a residual current device rated at no more than 30 mA.
Our final take
Buy the type before you buy the brand. If your heat source lights up, you need a dimming thermostat, and the Zoo Med ReptiTemp Dimming Thermostat is a properly documented way to get one. If you have a mixed or growing setup, the Herpstat 2 buys you two independent channels, both control modes and a real safety relay, provided you remember to switch that relay on. The Inkbird ITC-306T is a good cheap mat controller and nothing more. Skip the analog 500R, because a thermostat you cannot read is a thermostat you cannot check. Then add the things no controller replaces: an independent thermometer, a GFCI outlet, and a reptile-experienced veterinarian for anything about your animal’s health or temperature requirements.
Questions, answered
Can I run a basking bulb on an on/off thermostat?
Manufacturers say no, and they say it in their own product copy. Habistat's Mat Stat page states plainly that it is not suitable for controlling light bulbs, and explains that constantly switching a bulb on and off distresses the animals and causes frequent lamp failure, which in turn is likely to damage the thermostat. Microclimate makes the same split in its user guide: pulse thermostats should only be used on non light emitting heat sources, while dimming thermostats can be used on all heat sources. Zoo Med sells a separate dimming unit specifically for dimmable heat sources rather than telling you to use its on/off models. If your heat source produces visible light, the correct control type is dimming.
Where exactly should the probe go?
It depends on the heat source, and getting it wrong gives you an accurate reading of the wrong thing. Microclimate's Dimmer B1 and Pulse B2 guide says the sensor should hang in free air inside the enclosure and should not be mounted to the wall, because a wall-mounted probe reads the wall rather than the air. For a heat mat under substrate, the same guide says to place the sensor under the substrate attached to the top of the mat, so the thermostat controls the mat surface directly. For a basking setup, Microclimate says to place the sensor in the basking area, and Zoo Med's dimming thermostat sheet adds that if the probe sits near an overhead source you must shade the tip so it is not directly under the lamp, which otherwise causes a false high reading. Spyder Robotics adds two practical notes: do not fix the probe with aluminium tape, and keep probe wires a few inches away from the mains cables running to the heaters.
What happens if the thermostat itself fails, and do I need a second one?
A mains switching device can fail with the heat source stuck on, which is why the documented failure behaviour matters more than the accuracy figure. Among these four, the Herpstat 2 is the only one with an internal safety relay that can cut power to every output on a high alarm, and its manual makes clear that this is not the default setting, so you have to turn it on. Inkbird describes a second relay in the ITC-306T as a protection relay alongside the control relay. Habistat documents a super fast blow fuse and a safety cut out on its digital dimming unit that turns the heater off if the thermostat is damaged by a heater short circuit. Wiring a separate high-temperature cutoff thermostat in series is standard practice among experienced keepers, but we did not find it documented as a manufacturer instruction on any of these products, so treat it as hobby practice rather than a maker recommendation. Habistat's safety instructions do give one manufacturer-documented electrical measure worth copying: supply the device through a residual current device rated at no more than 30 mA, which in a US home means a GFCI outlet.
How much wattage can I actually plug in?
Use the number the maker prints and treat it as an absolute ceiling. The Herpstat 2 is 900 watts total but no more than 500 watts on either output, so a 600 watt device on one outlet is out of spec even though the unit is rated for 900. Zoo Med rates the dimming ReptiTemp at 600 watts maximum resistive load, and the 500R at 500 watts across both ports combined. Inkbird publishes a 10 A relay contact rating rather than a wattage, which is not the same thing as a continuous-duty rating. In fact none of these makers publishes a separate continuous-duty figure at all, so the sensible reading is that the stated maximum already assumes continuous use and you should leave headroom rather than sit at the limit. If you run two heaters from one unit, they add up.
Is a rheostat the same thing as a thermostat?
No, and confusing the two is the other classic beginner mistake in this category. Zoo Med answers this directly in its own FAQ: a rheostat is basically a dimmer that lets you manually reduce the power reaching a heater, while a thermostat senses the temperature and controls the heater accordingly. A rheostat has no feedback loop, so if your room warms up in July the rheostat keeps delivering exactly the same power and the enclosure follows the room. It is a useful accessory for trimming a heat source that is slightly too strong, and it is not a substitute for temperature control. You should also keep a separate thermometer in the enclosure regardless of which thermostat you buy, because Microclimate points out that a thermometer placed anywhere other than the sensor position will read differently by design.
Deciding between the top two? See our head-to-head: Spyder Robotics Herpstat 2 vs Zoo Med ReptiTemp Dimming Thermostat (RT-600P).
More Pets reviews
 Best Self-Cleaning Litter Boxes (2026): What We'd Actually Put in Our Homes
  The Best Slow-Feeder Dog Bowls: 4 Compared (and One to Skip)
  The Best Small Animal Cages: 4 Compared (and One to Skip)
  The Best Squirrel-Proof Bird Feeders: 4 Compared (and One to Skip)
  The Best Wireless & GPS Dog Fences: 4 Compared (and One to Skip)
  The Best Cat Litter Boxes: 4 Compared (and One to Skip)