Explained
Snowshoes, Explained
You'll be able to read a snowshoe spec sheet and pick the size, traction level, and binding that fit your terrain instead of guessing from the price tag.
In this guide
Snowshoes all look like variations on the same oval frame, but the details decide whether a winter hike is fun or exhausting. Most first-time buyers get tripped up by two things: sizing the shoe to their body weight instead of their height, and buying more traction (or less) than the terrain they actually walk demands.
The 30-second version
- Size by loaded weight, not body weight alone. your pack, boots, and winter layers all add pounds the deck has to float.
- Traction should match terrain, not ambition. full-frame steel traction is a safety feature on ice and sidehills, but overkill and clunky on flat groomed paths.
- The binding is what you'll fight with in the cold. test whether you can operate it with gloves on before you care about anything else.
- A heel-lift bar only matters if you climb. it saves your calves on sustained ascents and does nothing for you on flat trails.
- Modular tails buy you flexibility. a shorter, more maneuverable shoe that can add flotation for a deep-snow day beats a fixed long deck you carry year-round.
The products this guide is about
Our verdict on each, with the full reasoning on the companion review.
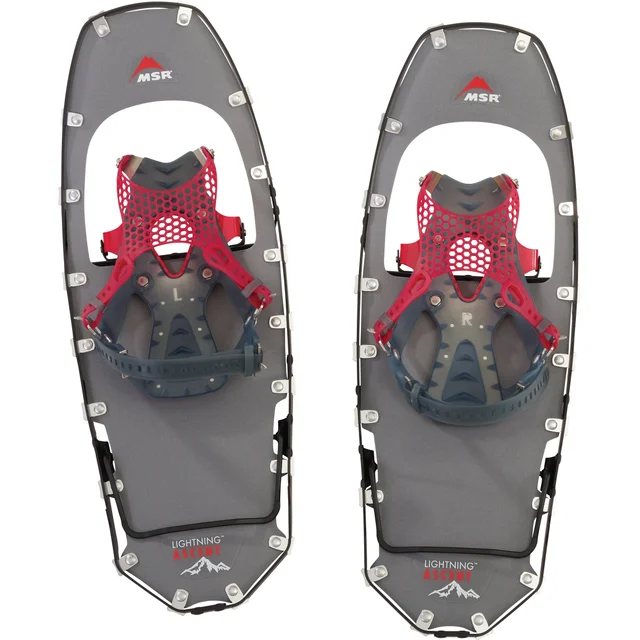
- Buy MSR Lightning Ascent The do-everything mountaineering snowshoe that grips steep, icy terrain most others slide on.
- Buy Tubbs Flex TRK A forgiving, easy-walking all-rounder that turns rolling winter trails into a relaxed day out.
- It depends MSR Evo Trail A tough, dead-simple budget unibody that quietly outperforms its price on flat and rolling ground.
- Skip Atlas Range-MTN A capable BOA-equipped mountain shoe that is genuinely good, but heavier and pricier than the class leader.
What actually matters
- Flotation is the whole point of a snowshoe: enough surface area to keep you from sinking into soft snow, sized to your loaded weight and the snow conditions you expect.
- Traction system determines how confidently the shoe grips ice, packed trails, and steep sidehills, ranging from simple toe crampons to full-perimeter steel frames.
- Binding type governs how fast and securely you can strap in with cold or gloved hands, and whether the shoe stays put on a traverse.
- Frame stiffness and terrain rating tell you whether a shoe is built for mellow rolling trails or steep, technical, mountaineering-style ground.
- Heel-lift bar is a small hinged bar under the heel that reduces calf strain on long climbs; useful for backcountry use, irrelevant for flat walks.
- Deck material and durability affect how much abuse the shoe shrugs off over seasons, from rocks and roots to being tossed in and out of a truck bed.
- Weight underfoot compounds over miles; a heavier shoe tires your legs faster, especially on long or steep days.
The specs, in plain English
Green flags vs red flags
Green flags
- Manufacturer publishes clear weight ranges per deck size, including with a loaded pack
- Binding can be tightened and released one-handed or with gloves on
- Traction extends along the sides of the frame, not just a single toe crampon
- Add-on tails or multiple deck lengths are available for the same binding
- Owner reports mention years of use without frame or binding failure
- Heel-lift bar is easy to flip up with a pole tip or boot toe, not a fussy fiddly latch
Red flags
- No published weight rating, or a size chart that only lists your height
- Binding requires bare hands or two hands to adjust reliably
- Traction is a single small crampon with nothing along the frame edges
- Sold in one fixed size with no tail or size options for heavier loads
- Owner reports of straps or buckles cracking or slipping in cold temperatures
- Marketed for backcountry or mountaineering use with no heel-lift bar at all
Who's who: the brands
- MSR - Known for aluminum-frame mountaineering shoes with modular tails and strong traction, alongside simpler molded budget models.
- Tubbs - Focuses on trail and day-hiking shoes with flexible decks aimed at comfort over rolling terrain.
- Atlas - Makes cushioned, suspension-equipped shoes often paired with dial-style bindings for quick adjustment.
- Crescent Moon - Known for round-deck designs aimed at even weight distribution and a different flotation approach than traditional oval decks.
- Yukon Charlie's - Positioned as an accessible entry point for casual and budget-minded snowshoers.
How to read a listing without getting fooled
A snowshoe listing usually leads with deck size in inches (like 22 or 25) and a weight range. Check that your loaded weight, not your bare body weight, falls comfortably inside that range, and note whether the shoe supports add-on tails if you expect deep snow. Next look past the marketing language for the traction description: 'full-frame' or 'perimeter' traction means aggressive, all-terrain capability, while a single toe crampon signals a trail-focused shoe. Scan for the word 'heel-lift,' 'climbing bar,' or 'televator' if you plan to climb; its absence is a real limitation, not an oversight. Finally, check the binding description for how it's operated (pull-strap, ratchet, or dial) since that's what you'll be wrestling with in the cold more than any other spec.
How much should you spend?
Snowshoe pricing tracks two things: traction aggressiveness and binding sophistication. Simple molded shoes with basic crampons and pull-strap bindings sit at the affordable end and are genuinely good value if your outings stay on flat or gently rolling packed terrain. Mid-range shoes add a more comfortable flexing deck and a faster, more secure binding, which is where most casual to intermediate snowshoers find the best balance of cost and capability. The jump to flagship pricing buys full-frame traction, a heel-lift bar, and modular tails, features that matter a lot once you're on steep or icy ground and add little if you never leave groomed trails. Spend up only if your terrain actually demands the extra traction and climbing features; otherwise a mid-range shoe will outperform its price for years.
Questions, answered
How do I choose the right snowshoe size?
Base it on your loaded weight, meaning your body weight plus boots, pack, and winter layers, not just your height. Manufacturers publish a weight range per deck size. If you're near the top of a range or expect deep, soft snow, size up or choose a model with add-on tails rather than forcing a shoe that's rated too light for your load.
Do I need aggressive traction, or is a basic crampon enough?
It depends entirely on terrain. Flat to rolling packed trails need only a basic toe crampon. Once you regularly cross steep sidehills or firm, icy slopes, full-frame traction becomes a real safety factor rather than a nice-to-have. Buying more traction than your terrain requires mostly adds cost and a slightly clunkier feel on easy ground.
What does a heel-lift bar actually do?
It's a small bar you flip up under your heel before a sustained climb, which props your heel higher so your calf and Achilles don't stretch as far with every step. On long or steep ascents it noticeably reduces fatigue. On flat terrain you'll never use it, which is why flat-focused shoes often leave it out.
Are snowshoe bindings hard to use with gloves on?
Modern pull-strap and dial-style bindings are far easier than older ratchet designs, but they're not all equal. The real test is whether you can tighten and release the binding without removing your gloves, since bare hands in deep cold are the bigger problem than any binding design.
Do I need poles for snowshoeing?
Poles aren't required, but adjustable poles with snow baskets add balance and take load off your legs, especially on climbs, descents, and traverses. If you already own trekking poles, you can usually just swap on winter baskets instead of buying a dedicated snowshoeing set.
Can I use the same snowshoes for flat walks and steep backcountry trips?
A shoe built for steep, icy terrain will handle flat trails fine, just with more weight and traction than you need. The reverse isn't true: a flat-terrain shoe without full-frame traction or a heel-lift bar will struggle and feel unsafe once the ground steepens. If your trips vary widely, size toward your hardest expected day.
Or jump to the head-to-head: MSR Lightning Ascent vs Tubbs Flex TRK.