Explained
Bar Clamps, Explained
After reading, you'll understand the main clamp types, what force and throat depth mean, and which clamps to buy first.
In this guide
First-time buyers usually buy clamps by the pack, then discover the pack is too short and too weak for the project in front of them. Bar clamps come in a few distinct types that do different jobs. The spec sheets use terms like throat depth and working load limit that are rarely explained. Knowing what each one means makes it easier to buy a few clamps you keep for decades.
The 30-second version
- Parallel clamps are for glue-ups, because their jaws stay square and keep panels flat.
- One-handed clamps are for speed, so they suit holding and installing more than fine assembly.
- Published force is the key number, and a missing rating means you are relying on owner reports.
- Throat depth decides reach, since a deeper throat presses further into the work.
- Buy lengths for real projects, starting with a pair of 24 inch clamps and adding longer ones later.
The products this guide is about
Our verdict on each, with the full reasoning on the companion review.
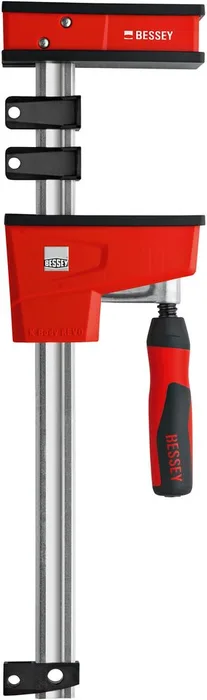
- Buy Bessey K Body REVOlution Parallel Clamp (KRE3524, 24 in) A heavy parallel-jaw clamp with published 1700 lbs of force that keeps glue-ups flat and square.
- Buy IRWIN QUICK-GRIP Heavy-Duty One-Handed Bar Clamp (24 in) A one-handed trigger clamp rated to 600 lbs that handles most holding jobs and rough glue-ups.
- It depends Jorgensen Cabinet Master Medium-Duty 90° Parallel Jaw Bar Clamp (24 in) A lower-cost parallel clamp with large jaws and a built-in stand, but no published clamping force.
- Skip WORKPRO 6-Pack Bar Clamps (4 x 6 in, 2 x 12 in) A cheap six-clamp set that looks like a starter kit but is rated to only 150 lbs and 12 inches.
What actually matters
- Clamp type - Parallel, one-handed, F-style and pipe clamps each suit different work. Choosing the type first narrows everything else.
- Clamping force - More force closes stubborn joints and wide panels. Light clamps are fine for holding but struggle with glue-ups.
- Jaw squareness - Jaws that stay at 90 degrees keep cabinet boxes square. Trigger clamps can rack under heavy pressure.
- Throat depth - This is how far the jaw reaches from the bar. Deeper throats spread pressure further across a panel.
- Capacity - The maximum opening decides what you can clamp. Too short is the most common mistake with budget sets.
- Pads - Replaceable, non-marring pads protect the work and extend the clamp's life.
- Warranty - Clamps last a long time, so lifetime coverage on premium models is worth checking.
The specs, in plain English
Green flags vs red flags
Green flags
- A published clamping force in pounds
- A stated throat depth
- Replaceable, non-marring pads
- Jaws described as staying at 90 degrees
- A lifetime or long warranty
Red flags
- No force rating anywhere on the listing
- Multi-packs made mostly of very short clamps
- Force ratings in the low hundreds sold for glue-ups
- Vague 'heavy duty' claims with no numbers
- No stated capacity or throat depth
Who's who: the brands
- Bessey - Known for the K Body parallel clamp, a long-standing benchmark for cabinet and panel glue-ups.
- IRWIN - Makes the QUICK-GRIP one-handed clamps, sold in medium and heavy duty versions.
- Jorgensen - Pony Jorgensen makes the Cabinet Master parallel clamps along with classic pipe and F-style clamps.
- WORKPRO - Sells budget tool sets and multi-packs of light-duty clamps.
How to read a listing without getting fooled
Start with the clamp type, then look for three numbers: clamping force, capacity and throat depth. Force tells you how hard it squeezes, capacity tells you how wide it opens and throat depth tells you how far it reaches. Check whether the jaws are described as parallel and whether the pads are replaceable. If a listing gives only a capacity and the words 'heavy duty', treat the missing force rating as a warning rather than an oversight.
How much should you spend?
Light one-handed clamps and multi-packs sit in the budget tier and are fine for crafts and holding. Heavy-duty one-handed clamps are still budget to mid-range and cover most DIY jobs. Parallel clamps are mid-range to premium each, which is why most woodworkers build a set gradually, starting with a pair in the length they use most.
Questions, answered
How many clamps do I need to start?
Two or four good clamps in a useful length will handle most early projects. Add more as projects demand them. Buying a large set up front often means owning many clamps of the wrong size.
Can I use one-handed clamps for glue-ups?
Yes, for smaller or less critical glue-ups. A heavy-duty one-handed clamp has enough force for many jobs. For wide panels and cabinet boxes that must be square, parallel clamps do better.
What is the difference between an F-clamp and a bar clamp?
F-clamps are a type of bar clamp with a sliding jaw and a screw handle, shaped like the letter F. They are strong and inexpensive but slower to set than trigger clamps. Parallel clamps are a heavier style made for square glue-ups.
How do I keep glue off my clamps?
Wipe squeeze-out before it hardens and use pads or a strip of tape on the bar. Many parallel clamps have replaceable pads, which makes cleanup easier. Some makers also remind you to remove glue from the clamp as soon as possible.
Or jump to the head-to-head: Bessey K Body REVOlution Parallel Clamp (KRE3524, 24 in) vs IRWIN QUICK-GRIP Heavy-Duty One-Handed Bar Clamp (24 in).